winter clover market 2013

Sunday, January 27, 2013

One of my favorite indie craft shows in the Philadelphia area has added a new indoor venue to it's seasonal schedule. You can now shop the Clover Market in January! It was today at the 23rd Street Armory in Philadelphia, so if you missed it you'll have to settle for putting the Ardmore spring shows on your calendar (April 14, May 19, & June9). In the meantime you can visit the vendors' online stores. And to whet your appetite, here's some eye candy from the day...
Jay McCarroll
Brush with fame! If you follow project Runway, this face is probably familiar to you. It's Jay McCarroll, the winner of PR's first season. He had a booth full of items made from printed fabrics from his line by Free Spirit. He gamely posed with gushing fans non-stop while my friends and I perused his wares.
wristlets by Janet McCarroll
His sister, Janet, stitched up these modern little wristlet purses.
Jay McCarrol printed skirts
The offbeat, cheerful point of view we got to know on the show 8 years ago is still evident in Jay's colorful work today. Nice guy.
{me}longings
One of my Etsy faves was there to day, too: {me}longings studio. Chanee Vijay designs and hand block prints her modern patterns using water-based inks on sustainably grown fibers.
{me}longings
The effect of the metallic printing is so beautiful in person. Earthy. Modern. Elegant.
Picked Vintage
The Picked Vintage booth was full of midcentury goodness. I love this vignette with the rope chair and the 1970's telephones. The owner, Jen, has such good taste, you should stop by their website for her latest finds.
French Vanilla
French Vanilla doesn't have a web store, but they can be found at shows like Brooklyn Flea as well as the Clover Market. Lots of cool accessories with patina.
French Vanilla
I fell in love with these kitchy oil portrait painting that proprietor Peg VanDyne bought at the estate sale of an art teacher. They remind me so much of the ones on the walls at Fishs Eddy in NYC, but those aren't for sale- these are. Contact her at fv.antiques@yahoo.com if you're interested. I tried to convince her to at least get a Facebook page going to show off her finds...I hope she'll take my advice!
from Hook Lady
Is this not the most adorable doorknocker for your cottage in the woods? It's a vintage reproduction by Judy Spivak of Hook Lady. She carries a nice mix of vintage & vintage reproduction hooks, brackets, doorknobs, etc.
Bee Vintage Redux
Bee Vinage Redux had the sweetest jewelry recycled from vintage pieces. I'm loving the dogwood motif.
Bee Vintage Redux
Charming tote bags appliqued with vintage handkerchiefts. Lovely!
Yumtown
The food trucks did not disappoint. Why does it feel cooler to buy food from a truck? I don't know, but Yumtown had a menu featuring locally sourced, fresh ingredients. That's pretty cool.
A visit to the Clover Market is never complete without some cupcakes. There's my friend Karen, the cupcake connoiseur, splurging on a dozen from Sweet Box. She bravely included the bacon-maple flavor in the mix which is just a tad out of my comfort zone, but supposedly it's good!

Well that's it for my round-up. Keep shopping small!

healthy coconut shrimp recipe

Monday, January 7, 2013


Feeling overstuffed after the holidays and tired of winter already, I am consumed by two urges:
1- to start eating healthy again
2- to go on a tropical vacation
But who am I kidding? The vacation isn't happening, but we can pretend. Coconut shrimp should do the trick! I always order this if I see in on a restaurant menu, so I've had it prepared by many chefs, but it is always deep-fried. I've experimented at home and have had trouble with the deep frying method. The coconut tends to fall off and it just feels oily. I like more crunch and I don't like to see those paper towels saturated with oil. I invented a healthier version that is baked, very crunchy, and totally satisfying. I've tested this on my family and it just gets scarfed up in no time.

crunchy baked coconut shrimp

by Rebecca Harkin


    1 lb large raw shrimp, peeled (tails on or off, whatever you prefer)
    3/4 cup panko crumbs
    1 1/2 cups sweetened flaked coconut
    1 1/2 tsp red pepper flakes (optional)
    1 cup flour
    1 tsp salt
    1/2 tsp pepper
    2 eggs, beaten

Start by oven-toasting the coconut & panko crumbs separately, spread evenly on 2 cookie sheets at 350° for 5 minutes or until they turn golden brown. Stirring part way through might be necessary if browning is uneven. Mix toasted crumbs and coconut in a medium bowl with red pepper flakes. In another bowl, beat 2 eggs. In a third bowl, mix flour, salt, & pepper. Dredge the shrimp in flour mixture first, dip in the egg until coated, then roll in the coconut/breadcrumb mixture. Really cake it on. Place the shrimp on a cooling rack coated with cooking spray on top of a cookie sheet. Bake this way at 350° for 15 minutes, or until shrimp are opaque. Serve with mango chutney or cocktail sauce for dipping. Great at an entree with Caribbean rice & beans.

serves 2-4 as an entree, more as an appetizer
The shrimp don't need very long to cook, so pre-toasting the breading essential, otherwise the shrimp will look undercooked.
Toast them separately, though, and keep a close eye on it. It's easy to burn them.
The breading step is pretty standard.
Baking the shrimp on a cooling rack on top of a cookie sheet allows the heat to get around all sides for even cooking.

Turn on the reggae and serve as an appetizer with mango chuntey (and/or cocktail sauce) or make it an entree with Caribbean beans & rice and a salad.
photo by Dana Harkin
Have a lovely vacation!

memory pillow project

Sunday, December 30, 2012

A dear friend asked me to help her out with some pillows she wanted to make for her nephews for Christmas. Their grandfather had passed away and she wanted to use some of his old clothes to make mementos for them. She and I went to RISD together, so we are on the same wave-length aesthetically. She said she wanted pillows pieced in the"Gee's Bend" style.
"Blocks and Strips" by Mary Lee Bendolph (photo Tinwood Media)
If you're not familiar with Gee's Bend, the name refers to the rural town in Alabama, a mostly black community with a history of economic struggles, but a strong sense of community. The tradition of quilting carried on there through the civil war, various economic upheavals including the Great Depression, floods of the Alabama River, and on to the present day.
"Housetop" by Lillie Mae Pettway (photo by Tinwood Media)
The quilts were made with available scraps of worn-out clothes with the freedom and innocence of "outsider art" although they were created for strictly practical purposes much like Amish quilts were. A collector discovered them in the late '90's, bought up hundreds of them and began exhibiting them. When viewed out of context in museums like the Whitney, they are bold, striking modern art. The book about them is wonderful. Auburn University has a wealth of information on them as well as a nice catalog.
The pile of items my friend sent looked random at first glance, but that's what you want if you're emulating the Gee's Bend style.
Many of the Gee's Bend Quilts are variations on the "Log Cabin" quilt pattern. I find this pattern lends itself to creating a spontaneous effect, as long as you don't measure anything, that is. Starting with a squarish shape, strips can be added on the outside edges, working in succession around it until you have the size you're after. True things as you go, or not. It's better if there is some unevenness to it.

I decided to keep the shirt pockets intact, because I think boys find them fun and it is more of a reminder that this was Grandpa's shirt. I also added a few of my own scraps of chambray to help make everything hang together more. But what you definitely don't want is to get matchy-matchy with it.
I also keep the button plackets intact for the backs for the perfect way to get the insert in & out for washing.
I tried not to be as anal as I usually am and just go with it. It actually goes very quickly when you're not trying to be precise. At the end, I trued it all up to the dimension of the pillow.
I hope they like them!

a swedish christmas

Friday, December 7, 2012

I'm not Swedish, I've never been to Sweden, but I love the idea of a Swedish Christmas. I imagine clean, bright colors + rustic straw ornaments all popping off of a whitewashed background filled with a mix of chippy Gustavian antiques and IKEA furniture. I imagine modest but well-designed handmade gifts, simply wrapped and the smell of gingerbread in the air. I imagine clomping around in some red clogs, wearing a ragg wool sweater. I have no idea if I am accurate in my fantasy, but I found a few things on the internets that fit my vision...

vintage red & white wallpaper-from smilemercantile
illustration of Stockholm- by annasee
traditional pepparkakor cookie recipe (thinner, crispier version of gingersnaps)- by The Wandering Cook
dala horse pillow- by LittleputtStudio
dala horse appliqué onesie-by chirp & bloom
Swedish clogs by Troentorp- from shoebuy
traditional Swedish straw ornament- similar on ebay
vintage dala horse- similar on Etsy


I find the dala horse especially charming, so I made up an appliquéd onesie for the shop. I always like an excuse to use my floral ribbons.

God Jul!


antiquing in chadds ford, pa

Thursday, September 6, 2012

Fall is coming and for me that means prime antiquing time! I don't know why, but I'm only in the mood for it in the fall.
click to enlarge
Being in Wilmington, we're lucky enough to be near some great antique stores. There's the whole Amish area in and around Lancaster, PA, but even closer is a string of stores along Rt1(Baltimore Pike) in Chadd's Ford, PA. You could spend all day in the area between Rt 202 & Rt 52 (closer to 52).
A Brandywine River antiques (aka "The White Barn")
B Pennsbury Chadds Ford Antique Mall 
C Springhouse Antiques
D Brandywine View Antiques

Brandywine View Antiques
This coming weekend, September 8 & 9, is a great time to go because Brandywine View is having it's annual "Massive Barn Market". You've gotta be tempted!
The big chair at Brandywine View 


As you're zooming along Rt 1, you might miss the sign, but you'll notice the humongous chair on the front porch. My friend Maria humored me by climbing into it when we were there a while back.
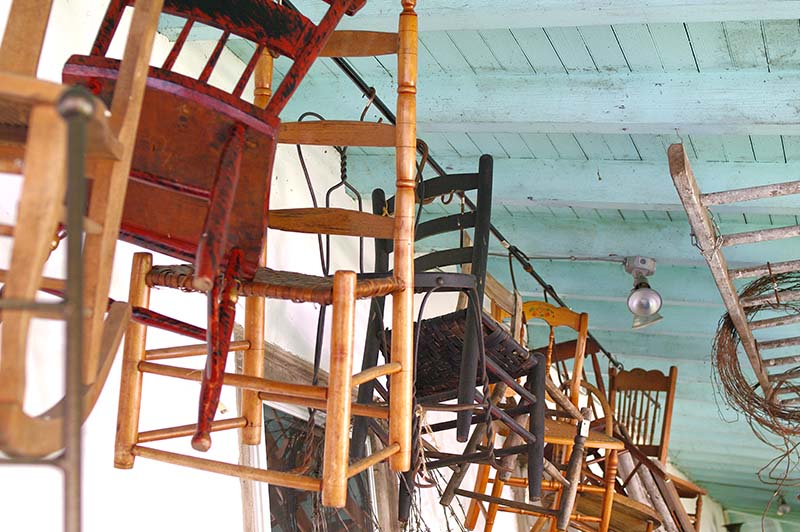
chairs at Brandywine View
They also have regular-size chairs.

salvage at Brandywine View
And a good deal of architectural salvage.
Brandywine View
Inside is 5000 square feet of furniture & accessories.
Proprieter Lisa keeps the inventory turning over constantly. You can often find her with a truckful at the Clover Market in Ardmore, PA.

All these pictures are from Brandywine View because I was just there, but believe me, the other stores nearby are each really good. The White Barn is the biggest- it just goes on and on...

You'll surely be hungry after all that antiquing and you won't be too far from Terrain at Styers, the garden store that has a cafe inside. Closer to the actual stores is the Chadd's Ford Winery tasting room in case you get thirsty;)

Let me know if you go...

what to do with peaches

Thursday, August 9, 2012


It's peach (and mango) season! The orchard up the road has beautiful juicy peaches right now. I don't bother with the mealy ones you can get at the supermarket. I could eat them for dessert every day.
I've already made cobbler and pie about a dozen times, so I thought I'd consult the cookbook a friend gave me, Mary Angela's Best of Everything, for something different. It's written by her talented-in-the-kitchen mother-in-law, Mary Angela Morgan.
She self-published the book which is very impressive because it looks like it's off the shelves of Barnes and Noble. Even has section tabs like my trusty Betty Crocker cookbook. I've actually been looking into what it takes to have a book published through traditional channels and basically, you have to be at least semi-famous already to get a book deal, especially for a cookbook.

Here's the recipe I made:

Mangoes & Peaches in Port Wine Syrup 

by Mary Angela Morgan 


    3/4 cup water
    3/4 cup sugar
    3/4 cup Port wine
    2 Tablespoons lemon zest
    1 ripe mango, peeled and chopped
    4 ripe peaches, peeled and sliced

The combination of the lemon zest and the Port wine make this recipe. The flavor is bright and sophisticated at the same time. Port wine has not been on my radar since I caught my grandmother taking a surreptitious swig of it in the pantry once. She loved her Port... perhaps a bit too much. I've started sneaking it into my cobbler now too (just a Tablespoon) for that extra little "je ne sais quois".

In a medium sauce pan stir sugar, water, and Port wine over medium heat until sugar dissolves. Add lemon zest (don't use that dry stuff!); bring to a boil. Lower heat and simmer uncovered 8 t0 10 minutes or until reduced to a medium thick syrup.
Add peach and mango slices. Mangoes can be tricky to cut up because of the big seed inside. There is a video of how to do it here.
Mangoes can be tricky to cut up because of the big seed inside. There is a video of how to do it here.
Simmer 1 minute. Transfer to a serving bowl to cool. Cover and chill for several hours. Serve in clear dessert bowls.
I served this to my own mother-in-law and got the thumbs-up. Enjoy!

salvaged denim headboard

Saturday, August 4, 2012


I finished this headboard for my little boy last week! I don't often make things that are NOT for my Etsy store these days, so it took a while. The idea was percolating on my back burner for over a year. At first I thought of making a quilt, but the little guy liked the idea of the padded headboard we made for the guest room, so the idea morphed into a headbaord. I decided to make it fancier than the guest room one by boxing out the sides and adding a back so the cover is removable for washing.
I've built up quite a hoard of denim cast-offs from family & from thrifting. What's the point of hoarding if you're never going to make anything out of it, right?

To make this project I used:
    -small hoard of cast-off denim
    -denim yardage- about 2 yards
    -1/4" plywood (I used 40" x 30" for a twin size)'
    -3" foam cut to size
    -quilt batting
    -muslin
    -piping cord
    -staple gun
    -sewing machine
    -heavy duty sewing machine needle (size 14/90)
    -pattern paper
    -flush mount hangers

If you were doing a single fabric stapled on, this would basically be your only step besides adding the hangers to the back. Layer the muslin, batting, foam and plywood to form the headboard base. Be sure to cut about 12" extra in height & with of the muslin & batting, so there is enough to wrap around the edges for stapling. You can always trim off the extra later.
To make the cover, I tried different layouts before cutting. I wanted light & dark to alternate. I debated whether to mix in some pocket-free squares and decided only to do that on the bottom row where the mattress and pillow would cover it anyway.
Since my headboard is 40" x 30", I made my pieces 10" x 10" squares (with the exception on the bottom four pieces)- just perfect for keeping pockets & details intact. The actual pieces including seam allowances measure 11" x 11" before sewing. Don't forget seam allowances! For the bottom four pieces, I added on 2" or so in height, so there would be extra to wrap underneath and meet up with the back to close the bottom. A separate band gets sewn on later to box out the top & sides.
One thing I learned is denim is THICK! Be sure you are using a heavy duty needle meant for denim. Also, most finished edges are not square. To make sewing easier and keep my pieces as close to square as possible, I fudged new edges in some places. By lapping on a trim piece that would become the seam allowance I avoided having to sew though all those extra bulky layers of a waistband with belt loops..
With the layout finalized, it's ready to sew together. At the thickest points, I found myself turning the wheel of the machine by hand rather than pressing the pedal, just to be safe. An industrial machine could plow through this, no problem, but I'm limited to my trusty Babylock.
Oh, and just to be hard on myself, I decided to pipe around the edges of the headboard. I made bias strips out of the same denim I was using for the sides and back and made my own piping. Use a zipper foot to get your stitches close to the bulge of the cord. You could certainly opt to skip this step.
I basted before sewing just to keep all this heavy fabric from slipping around. Then I sewed on the sides (a strip, 4" wide to accomodate the 3" foam + seam allowances) and back (same dimensions as the front out of denim yardage) leaving excess at the bottom to safety pin shut. If I were to do this again, I'd make reduce the width of the side piece by 1/4" since it came out a bit loose. Denim has a good deal of give. I contemplated a velco closure, but I was so worn out by the piping, that I took the easy way out. and just pinned it

Even easier would be omitting the piping and back, making a deep enough side panel to wrap around to the back for stapling.
Before slipping the cover on, I had my husband attach the flush mount hangers to the plywood back and to the wall. A level and accurate measuring come in handy for this. Then I slipped on the cover and cut holes in the back to expose the hangers.
Now my boy has a place to store his flashlights and other doodads in easy reach at night!